Recipes
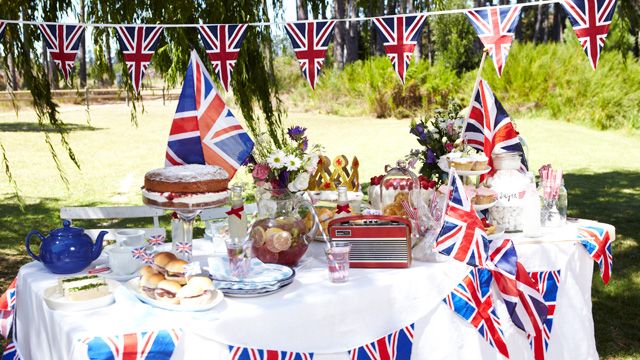
As we all get ready for the long bank holiday for the Platinum Jubilee there is no harm in getting some ideas ready for your Jubilee table spreads. There are many different and beautiful dishes that can be made, in aid of this special social occasion. Many of us will be celebrating in different ways, such as street and garden parties, all dressed to the hilt in Union Jack bunting and Union Jack tableware.
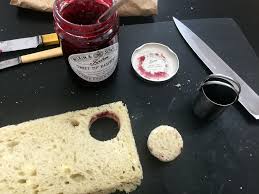
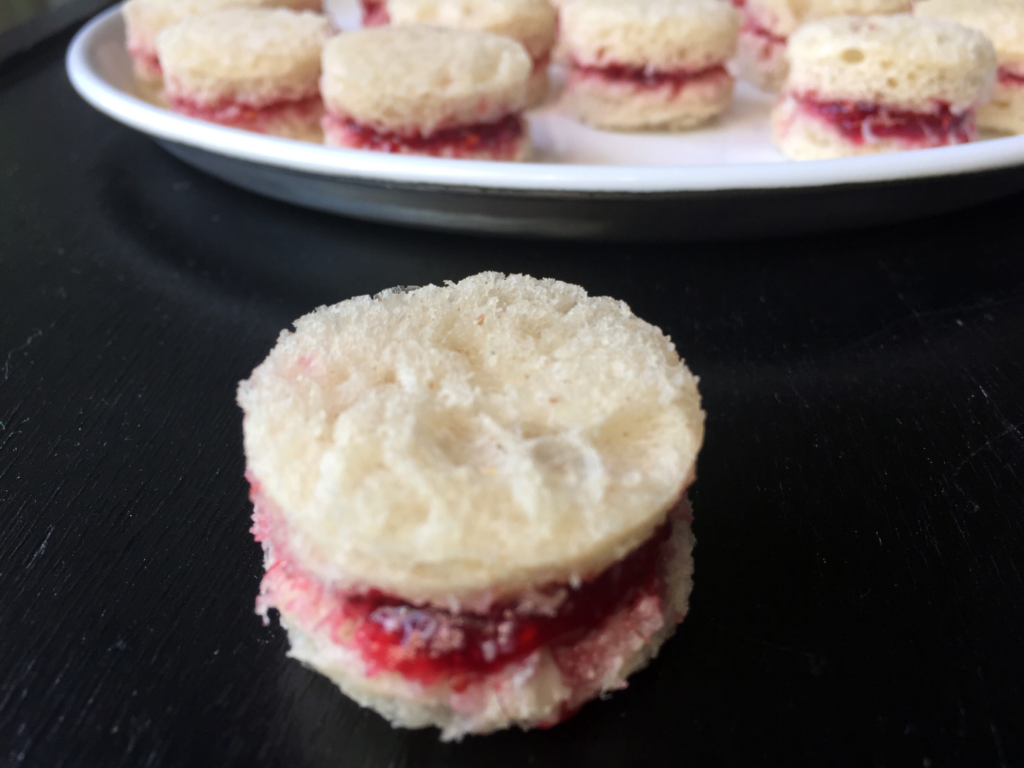
Jam Pennies
Jam Pennies are said to be a favourite of the Queen. They are a beautiful sandwich buttered, filled with raspberry jam and cut into little circles the size of an old English penny…..hence the name, Jam Pennies.

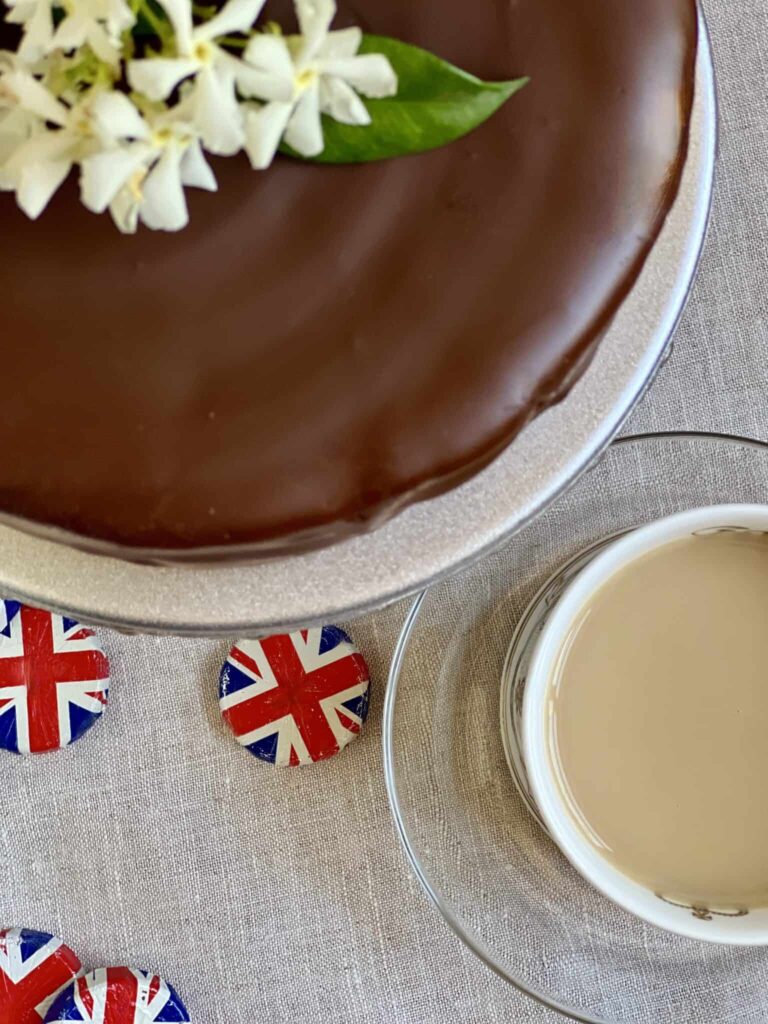
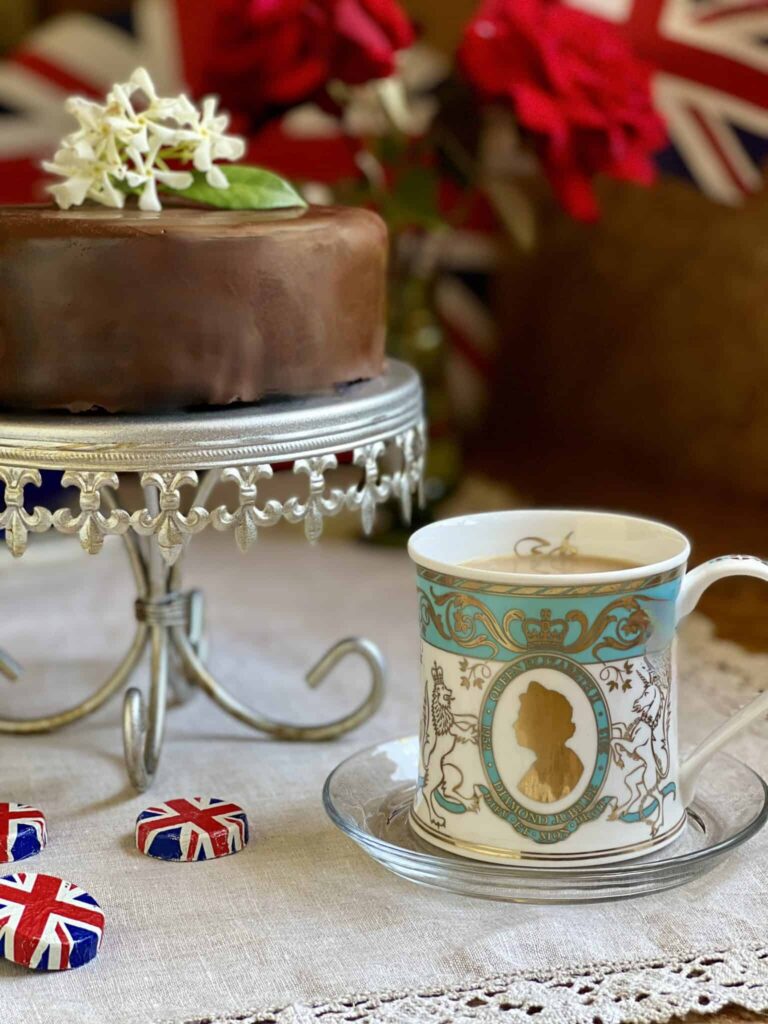
Chocolate Biscuit Cake
Chocolate biscuit cake is a no bake cake recipe that happens to be Queen Elizabeth’s favourite cake! Growing up in the UK, this type of treat, called a tiffin, is quite popular for one reason: it’s fantastic!
This rich dark chocolate cake has a lovely crunchy texture thanks to the addition of classic English cookies called Rich tea biscuits. A layer of decadent chocolate frosting is the perfect finishing touch.
Ingredients:
- Cake:
- 1/2 teaspoon butter, for greasing the pan
- 225g Rich tea biscuits or sweet cookies
- 115g unsalted butter, softened
- 115g granulated sugar
- 115g dark chocolate
- 1 egg
- Icing:
- 225g dark chocolate, for coating
- 30g ounce chocolate, for decoration
Preparation
1. Lightly grease a 6-inch-by-2½-inch cake ring with the butter and place on a tray on a sheet of parchment paper.
2. Break each of the biscuits into almond size pieces by hand and set aside.
3. In a large bowl, combine the butter and sugar until the mixture starts to lighten.
4. Melt the dark chocolate and add to the butter mixture, stirring constantly.
5. Add the egg and beat to combine.
6. Fold in the biscuit pieces until they are all coated with the chocolate mixture.
7. Spoon the mixture into the prepared cake ring. Try to fill all of the gaps on the bottom of the ring because this will be the top when it is un-molded.
8. Chill the cake in the refrigerator for at least 3 hours.
9. Remove the cake from the refrigerator and let it stand.
10. Meanwhile, melt the 8 ounces of dark chocolate in a double boiler or saucepan on the stove top over low heat. Slide the ring off the cake and turn it upside down onto a cake wire.
11. Pour the melted chocolate over the cake and smooth the top and sides using a palette knife.
12. Allow the chocolate to set at room temperature.
13. Carefully run a knife around the bottom of the cake where the chocolate has stuck it to the cake wire and lift it onto a tea plate.
14. Melt the 30g of chocolate and use to decorate the top of the cake.
Courtesy of Chef Darren McGrady, The Royal Chef.
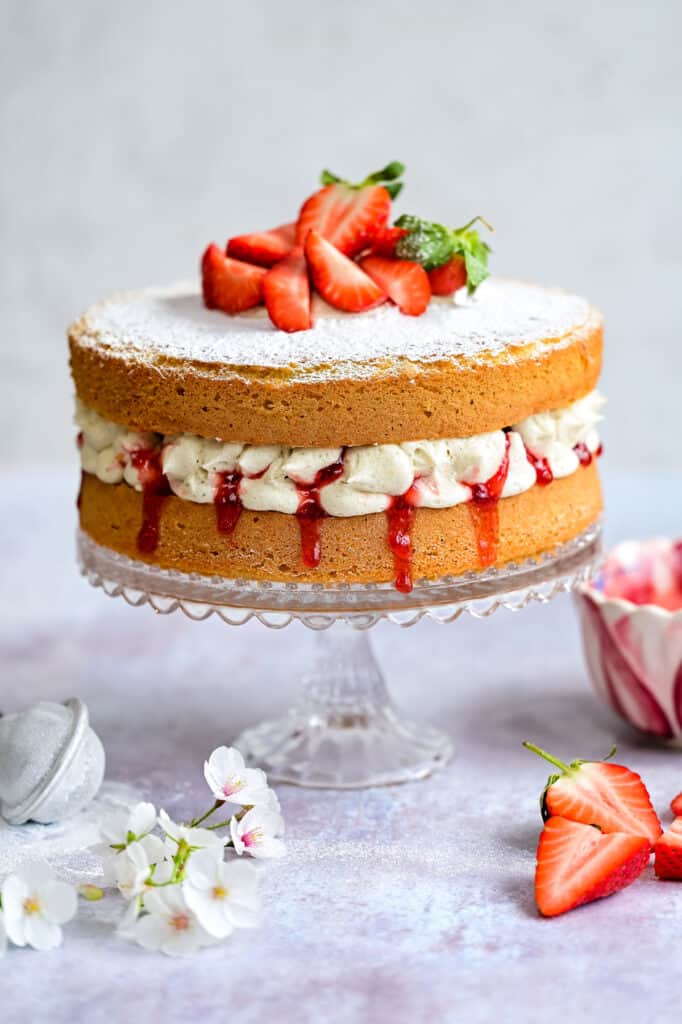
Mary Berry’s Victoria Sponge
I love Mary Berry recipes, all easy and always turn out like the pictures. Mary’s Victoria sponge cake is a classic and a tasty tea-time treat every-time. I guarantee most Jubilee tables this years will be the centrepiece for any traditional afternoon tea or Jubilee setting.
Ingredients:
- 4 free-range eggs
- 225g/8oz caster sugar, plus a little extra for dusting the finished cake
- 225g/8oz self-raising flour
- 2 tsp baking powder
- 225g/8oz butter at room temperature, plus a little extra to grease the tins
To serve:
- good-quality strawberry or raspberry jam
- whipped double cream (optional)
Method:
- Preheat the oven to 180C/160C Fan/Gas 4. Grease and line two 20cm/8in sandwich tins. Use a piece of baking paper to rub a little butter around the inside of the tins until the sides and base are lightly coated, then line the bottom with a circle of baking paper.
- Break the eggs into a large mixing bowl, then add the sugar, flour, baking powder and butter. Mix together until well combined with an electric hand mixer (you can also use a wooden spoon), but be careful not to over mix. Put a damp cloth under your bowl when you’re mixing to stop it moving around. The finished mixture should fall off a spoon easily.
- Divide the mixture evenly between the tins: this doesn’t need to be exact, but you can weigh the filled tins if you want to check. Use a spatula to remove all of the mixture from the bowl and gently smooth the surface of the cakes.
- Bake the cakes on the middle shelf of the oven for 25 minutes. Check them after 20 minutes. The cakes are done when they’re golden-brown and coming away from the edge of the tins. Press them gently to check – they should be springy to the touch. Set aside to cool in their tins for 5 minutes. Run a palette or rounded butter knife around the inside edge of the tins and carefully turn the cakes out onto a cooling rack.
- To assemble the cake, place one cake upside down onto a plate and spread it with plenty of jam. If you want to, you can spread over whipped cream too. Top with the second cake, top-side up. Sprinkle over the caster sugar.
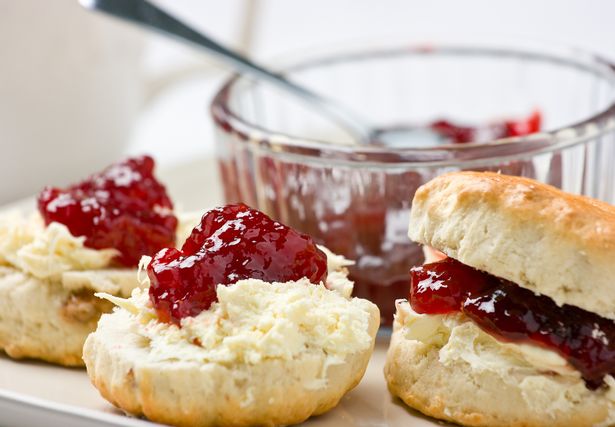
Classic Scones with Jam & Clotted Cream
Pure classic for any occasion, not just for afternoon tea’s and picnic’s! But the question, how do you layer yours? Jam first or cream?
Ingredients:
- 350g self-raising flour, plus more for dusting
- 1 tsp baking powder
- 85g butter, cut into cubes
- 3 tbsp caster sugar
- 175ml milk
- 1 tsp vanilla extract
- squeeze lemon juice
- beaten egg, to glaze
- jam and clotted cream, to serve
Method:
- Heat the oven to 220C/200C fan/gas 7. Tip the self-raising flour into a large bowl with ¼ tsp salt and the baking powder, then mix.
- Add the butter, then rub in with your fingers until the mix looks like fine crumbs. Stir in the caster sugar.
- Put the milk into a jug and heat in the microwave for about 30 secs until warm, but not hot. Add the vanilla extract and a squeeze of lemon juice, then set aside for a moment.
- Put a baking tray in the oven. Make a well in the dry mix, then add the liquid and combine it quickly with a cutlery knife – it will seem pretty wet at first.
- Scatter some flour onto the work surface and tip the dough out. Dredge the dough and your hands with a little more flour, then fold the dough over 2-3 times until it’s a little smoother. Pat into a round about 4cm deep. Take a 5cm cutter (smooth-edged cutters tend to cut more cleanly, giving a better rise) and dip it into some flour. Plunge into the dough, then repeat until you have four scones. You may need to press what’s left of the dough back into a round to cut out another four.
- Brush the tops with a beaten egg, then carefully arrange on the hot baking tray. Bake for 10 mins until risen and golden on the top. Eat just warm or cold on the day of baking, generously topped with jam and clotted cream. If freezing, freeze once cool. Defrost, then put in a low oven (about 160C/140C fan/gas 3) for a few minutes to refresh.
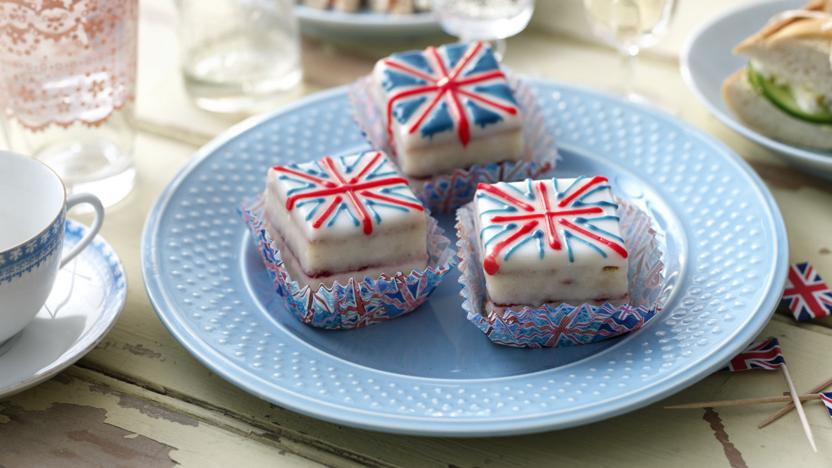
Shortbread Bunting Biscuits
Bright and cheerful shortbread biscuits decorated with bunting icing really signals party season. If you want to hone your icing skills, this recipe is the one for you – decadent, delicate decorations top buttery shortbread for a sweet treat that will wow the crowd!

- Makes 8
- 1 hr plus chilling and cooling
- 292 calories / serving
- Freezable
Ingredients:
- 100g unsalted butter, at room temperature
- 40g caster sugar
- 1 tsp vanilla extract
- 150g plain flour, plus extra, for dusting
- 250g icing sugar
- 1 large lemon, juiced
- gel food colourings (we used purple, pink and yellow)
Method:
- Put the butter and caster sugar in a mixing bowl. Beat with a wooden spoon until well combined, then beat in the vanilla extract. Stir in the flour and mix to a dough. If it’s too crumbly to roll, add a splash of water, a little at a time, until it comes together. The dough doesn’t need to be wet, but it needs to come together enough to roll out. If it’s too crumbly, it won’t roll neatly. Don’t overwork the dough, as this will make the finished biscuits tougher.
- Line a baking sheet with nonstick baking paper. Lightly dust the dough with flour, place in the centre of the sheet and roll out to an 8mm-thick, 22cm-diameter circle. Using the bottom of a 20cm cake tin or plate, cut around to remove the excess dough. Use a sharp knife to mark 8 triangle indentations, but don’t cut all the way through. Making indentations in the dough before baking makes it much easier to cut into triangles when the biscuits have cooled. Just don’t cut all the way through: about a third to halfway through will do. Chill for 30 mins. Preheat the oven to gas 5, 190°C, fan 170°C.
- Lightly prick the dough with a fork and bake for 15-20 mins until very lightly golden. Leave to cool on the baking sheet, then cut triangles using the indentations you made.
- Put the icing sugar in a mixing bowl and add the lemon juice, 1 tsp at a time, beating with a spoon until smooth. Any shapes made by mixing should disappear within 10 secs, as the icing returns to being glossy. The icing needs to be thick enough so that it doesn’t run or lose its shape when piped. Test it on a plate to make sure a drizzle from a spoon won’t go flat. You can also use royal icing sugar, which sets harder with more definition. Divide the mixture into as many bowls as you have colours, then squeeze a little colouring into each. Mix until completely combined (leave some white too, if you like).
- Fill disposable piping bags with the icing and snip the end of each one (about 3-4mm). Draw a thin outline around the edges of the biscuit with one colour, then leave for 5 mins to set. Pipe to fill with icing. Use a spoon to spread it out to the outline; repeat with the remaining biscuits. Pipe the outline about 2-3mm from the edge so it doesn’t drop off the side. Let it dry and form a skin then fill by gently pushing the icing into the corners. If there are lumps, gently tap the biscuit on the worktop until they flatten out. Leave for 10 mins. Draw dots, stripes or your own design. Use different colours to draw squiggles, stripes or polka dots. Just make sure the icing underneath has formed a skin or the designs will bleed into the background. Leave to set for 2 hrs. Will keep for up to 3 days in an airtight container.
Nathan’s tip: Add colouring to the icing a little at a time – you can add more, but you can’t take it away!
Go veggie: This recipe is vegetarian if not using pink or purple food colouring.
Cherry Bakewell Swiss Roll
This cake is two bakes for the price of one – what more could you want? Creamy, jammy Swiss roll is topped with flaked almonds and cherries for a Bakewell finish. Slice it up and dig in!
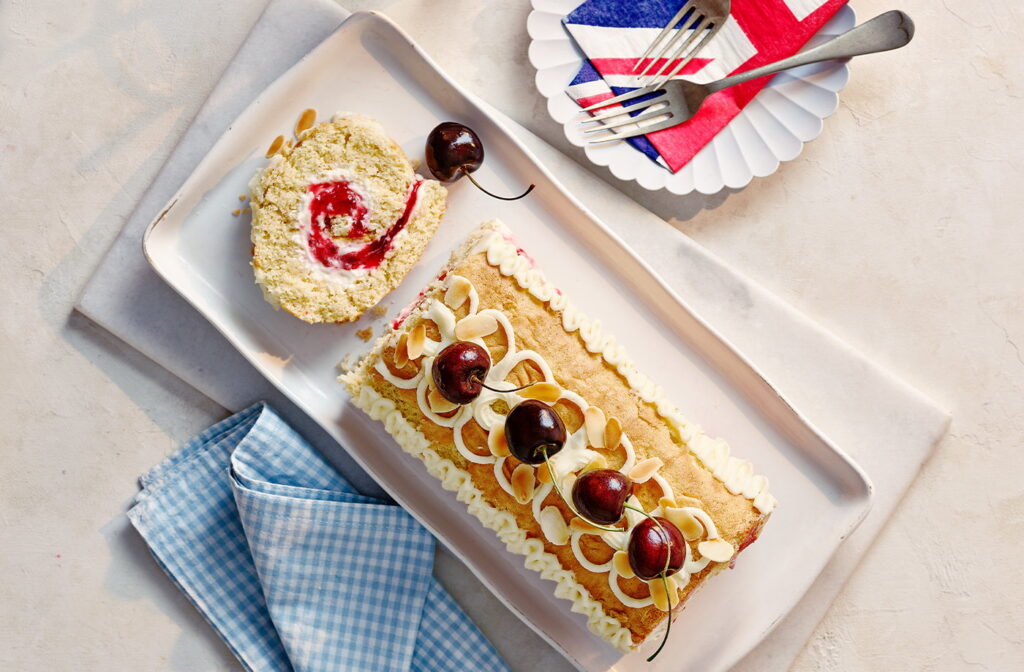
- Serves 10
- Takes 1 hr plus cooling
- 405 calories / serving
- Vegetarian
Ingredients:
- butter, for greasing
- 3 large eggs
- 125g caster sugar
- 125g self-raising flour
- 2 tbsp ground almonds
For the filling and decoration
- 300ml whipping cream
- 1½ tbsp icing sugar
- ½-1 tsp almond extract, to taste
- 150g cherry jam
- 350g vanilla frosting
- 4-5 fresh cherries with stalks, plus extra to serve (optional)
- 1 tbsp toasted flaked almonds
Method:
- Grease a 23 x 33cm Swiss roll tin with butter and line the base with nonstick baking paper.
- Preheat the oven to gas 6, 200°C, fan 180°C. Mix the eggs and caster sugar in a bowl with an electric mixer for 5 mins or until light and frothy, and a thick trail is left when the beaters are pulled away.
- Sift over the flour and add the ground almonds; fold with a spatula. Pour into the tin, pushing into the corners and levelling.
- Firmly tap the tin against the work surface to knock out any air bubbles. Bake for 10-12 mins until lightly golden and a cocktail stick inserted in the centre comes out clean. Run a knife around the edges of the tin.
- Lay a sheet of baking paper a little larger than the tin on a work surface. When the sponge is just cool enough to handle, invert onto the paper. Discard the paper that was in the tin. Score a line 1.5cm in from one of the short sides, then use the fresh sheet of paper to roll up the sponge into a spiral from the scored side, with the paper running through it. Leave seam-side down to cool.
- Whip the cream, icing sugar and almond extract together to stiff peaks. Unroll the sponge, leaving it on the paper, and spread the cream over the inside, leaving the scored edge clear. Spread the jam on top. Starting from the scored edge, use the baking paper to roll the sponge up. Transfer to a serving plate.
- Fill a piping bag fitted with a 3mm round nozzle with 75g of frosting. Fit 2 more piping bags with an 8mm star nozzle and a petal nozzle (1cm on the longest side) and fill with the remaining icing. Pipe teardrops along the centre using the star nozzle. Pipe U-shapes either side using the round nozzle. Pipe frills below this using the petal nozzle – follow the U-shape while making small, close zigzag movements up and down.
- Decorate with cherries and flaked almonds, then chill for 1-2 hrs. Will keep in the fridge for up to 3 days.
I hope you have a wonderful Jubilee, however you’re spending the bank holiday.
Thank you,
Nathan x